
Water damage can quickly turn solid plaster walls into weak, stained surfaces that affect both appearance and durability. Homeowners and business owners often notice discoloration, peeling paint, or soft spots after a leak or moisture buildup. Ignoring these signs allows the damage to spread deeper into the structure, which increases repair costs and effort over time. This guide explains water damaged plaster repair in a clear and practical way, helping you restore your walls with confidence. You will learn how to identify the cause, assess the severity, and repair the damage using simple and effective steps that deliver long lasting results.
Water enters plaster walls through several common paths, and understanding these causes helps prevent repeated damage after repairs. Roof leaks, broken plumbing lines, and poor drainage systems often allow water to seep into walls over time. High humidity levels inside kitchens, bathrooms, and basements also contribute to slow moisture buildup, especially when ventilation is poor. External walls face additional risk from rainwater penetration when cracks or gaps in sealing appear. Even a small leak can create serious issues if left untreated, as plaster absorbs moisture and gradually weakens. Identifying the exact source of water is a key step in any successful water damaged plaster repair process.
Leaks from pipes hidden behind walls often go unnoticed until visible damage appears on the surface, which makes early detection difficult. Roof damage can allow water to travel down into ceilings and walls, leading to widespread plaster issues. Poor sealing around windows and doors also creates entry points for rainwater, especially during heavy storms. In commercial spaces, faulty drainage systems or air conditioning leaks may contribute to continuous moisture exposure. Each of these sources affects plaster differently, but all require immediate attention. Fixing the moisture source before starting water damaged plaster repair ensures the repair work remains stable and prevents the same issue from returning later.
Water damaged plaster shows clear warning signs that help you act before the problem becomes severe. Discoloration often appears as yellow or brown stains, which indicate moisture trapped beneath the surface. Peeling or bubbling paint suggests that water has already affected the top layer of the wall. Soft or spongy areas signal deeper structural weakness that requires careful repair. In some cases, a musty smell develops, which may point to hidden moisture or mold growth behind the plaster. Recognizing these signs early allows you to begin water damaged plaster repair at the right time, which reduces damage and keeps repair costs manageable.
Proper assessment helps determine whether the plaster can be repaired or needs replacement, which saves time and effort during the repair process. Start by inspecting the affected area closely and noting the size and severity of the damage. Light surface damage usually involves minor stains or cracks, which can be fixed with simple patching methods. Deeper damage often affects the structure of the plaster and requires removal of weak sections. Moisture meters or basic touch tests can help confirm how far the damage extends. A careful inspection ensures that your water damaged plaster repair approach matches the condition of the wall and delivers reliable results.
Testing the strength of the plaster surface gives a clear idea of how much repair work is needed. Press gently on the affected area to check if the plaster remains firm or starts to crumble under pressure. A solid surface indicates that the damage is limited and can be repaired without extensive removal. If the plaster feels soft or breaks apart easily, the underlying layers have weakened and require replacement. Cracks that spread across a large area may also signal deeper structural issues. Understanding these conditions helps guide your water damaged plaster repair plan and prevents incomplete fixes that fail over time.
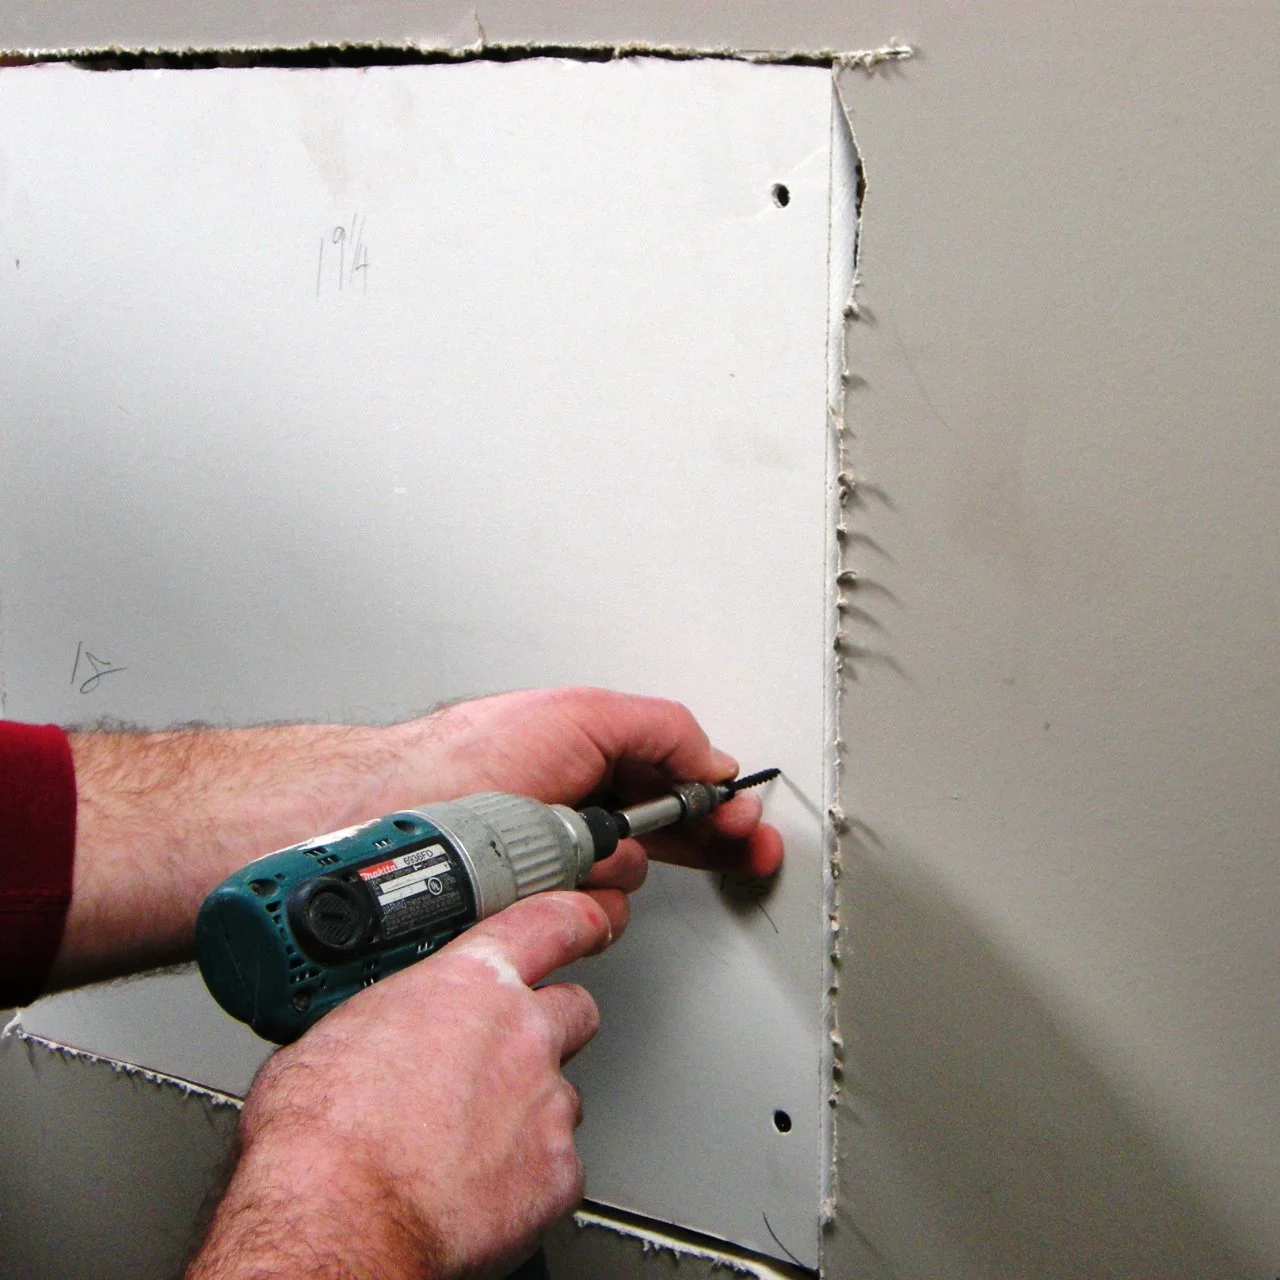
Some plaster damage reaches a level where repair is no longer practical, especially when large sections lose their strength and shape. Walls that show extensive crumbling, deep cracks, or repeated water exposure often require full replacement instead of patching. Attempting to repair severely damaged plaster can lead to uneven surfaces and recurring issues, which increases maintenance efforts. In such cases, removing the damaged sections and installing new plaster provides a more stable and long lasting solution. Knowing when to replace instead of repair is an important part of water damaged plaster repair, as it ensures the final result remains durable and visually consistent.
A structured approach makes water damaged plaster repair more effective and easier to manage, especially for those handling the task without professional help. Each step plays a role in restoring the wall to its original condition while preventing future problems. Preparation ensures the surface is ready for repair, while careful removal of damaged material creates a stable base. Applying patching compounds in controlled layers builds strength and smoothness. Finishing steps such as sanding and painting complete the process and restore the wall’s appearance. Following these steps in the correct order helps achieve a clean, even finish that blends well with the surrounding surface.
Preparation is a critical stage that sets the foundation for a successful repair process. Begin by ensuring the wall is completely dry, as trapped moisture can weaken new plaster and cause future damage. Use natural airflow, fans, or dehumidifiers to speed up drying if needed. Once dry, clean the surface to remove dust, dirt, and loose debris that may affect adhesion. Cover surrounding areas to protect them from dust and repair materials. Taking time to prepare the area properly improves the quality of water damaged plaster repair and helps the new material bond securely with the existing surface.
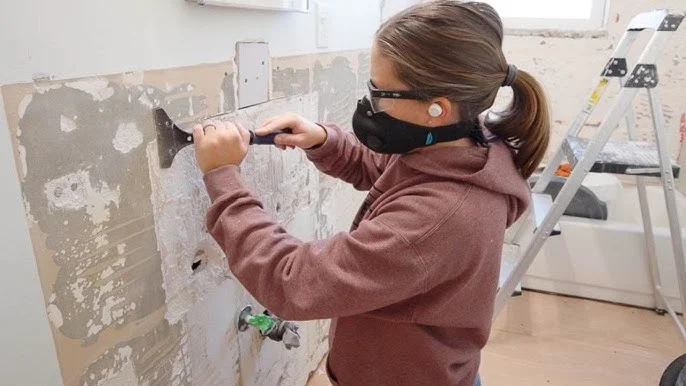
Removing damaged plaster ensures that the repair area remains strong and stable after the work is complete. Use a putty knife or similar tool to scrape away any loose, cracked, or crumbling material from the wall. Continue this process until you reach a solid and secure base that can support new plaster. Avoid leaving weak sections behind, as they can cause the repair to fail over time. This step may create uneven edges, but these can be smoothed during the patching stage. Careful removal is a key part of water damaged plaster repair, as it prepares the surface for long lasting results.
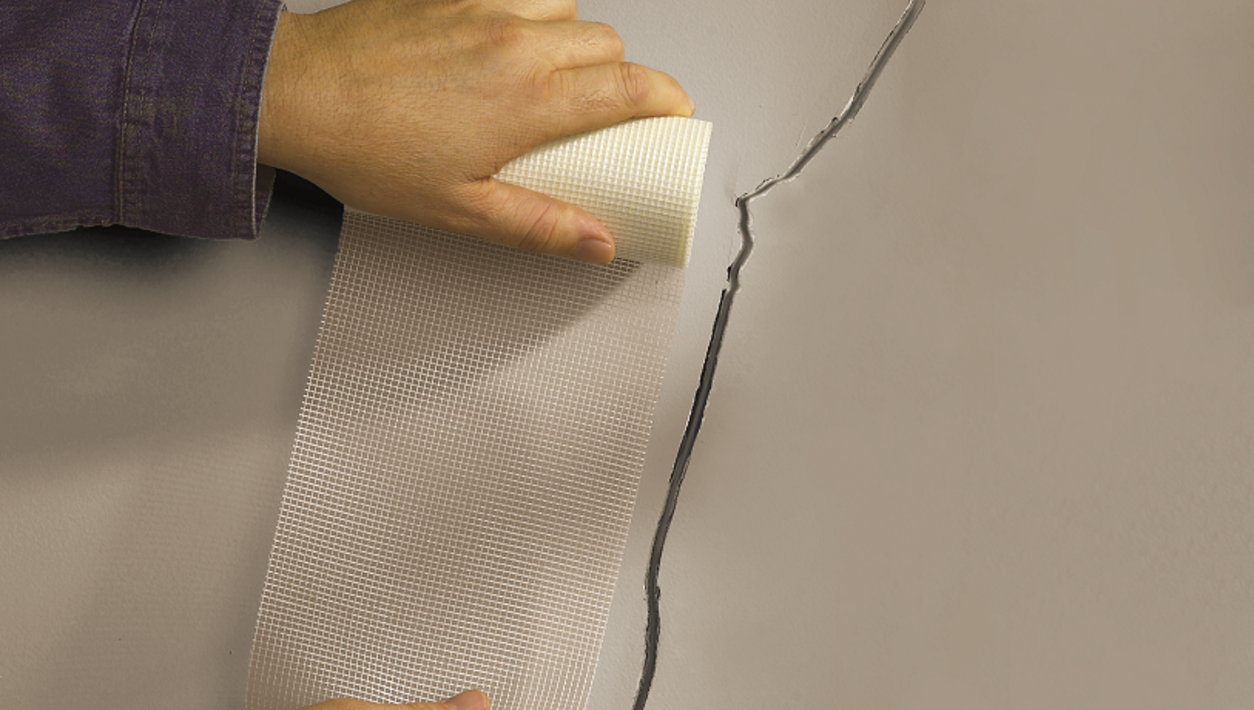
Applying the right patching material helps rebuild the damaged section and restore the wall’s strength and appearance. Use a plaster patch or joint compound that matches the existing wall type. Apply the material in thin, even layers rather than a single thick coat, as this reduces cracking and improves durability. Allow each layer to dry fully before adding the next one, which ensures proper bonding and a smooth finish. Shape the surface carefully to match the surrounding wall. This step requires patience, but it plays a major role in achieving a professional quality water damaged plaster repair result.
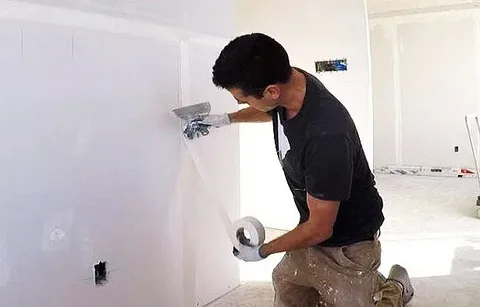
Sanding and finishing complete the repair process and give the wall a clean, uniform look that blends with the rest of the space. Once the patching material has dried completely, use fine sandpaper to smooth the surface and remove any uneven areas. Check the repaired section under good lighting to ensure it matches the surrounding wall texture. Apply a primer to seal the surface and prepare it for painting. Finish with a coat of paint that matches the original color. Proper finishing enhances the results of water damaged plaster repair and restores the wall’s visual appeal.
Preventing future damage is just as important as completing the repair itself, as moisture problems often return if the root cause remains unresolved. Maintaining proper ventilation helps control humidity levels, especially in areas prone to moisture buildup such as bathrooms and basements. Regular inspections of plumbing, roofing, and sealing points can identify potential issues before they lead to damage. Using dehumidifiers in enclosed spaces also helps keep walls dry. A proactive approach reduces the need for repeated water damaged plaster repair and keeps your walls in good condition for a longer period.
Effective drying methods ensure that no hidden moisture remains inside the wall after repairs are completed. Natural airflow works well in many cases, but enclosed spaces may require additional tools such as fans or dehumidifiers to remove excess moisture. Avoid sealing or painting the wall before it is fully dry, as trapped moisture can lead to peeling or cracking later. Monitoring the area for a few days after repair helps confirm that drying is complete. Consistent drying practices support successful water damaged plaster repair and reduce the risk of future problems.
Addressing the source of water is a necessary step that prevents the same damage from occurring again. Repair leaking pipes, seal cracks in walls or roofs, and ensure proper drainage around the building. Improve ventilation in areas with high humidity to reduce moisture buildup. Regular maintenance checks help detect issues early and keep the structure protected. Ignoring the source will lead to repeated repairs and increased costs over time. A complete water damaged plaster repair process always includes fixing the underlying cause to ensure lasting results and a stable wall structure.
Some repair situations require professional expertise, especially when the damage covers a large area or affects the structural integrity of the wall. Persistent moisture problems, hidden leaks, or signs of mold growth also call for expert inspection and treatment. Professionals use specialized tools and techniques to identify underlying issues and provide long term solutions. Hiring an expert can save time and prevent costly mistakes, particularly in commercial properties where damage may impact operations. Knowing when to seek professional help is part of effective water damaged plaster repair, as it ensures the job is completed safely and correctly.
Water damaged plaster repair becomes manageable when you follow a clear process and address both visible damage and hidden causes. Identifying the source of moisture, assessing the severity, and applying proper repair techniques help restore your walls to a strong and clean condition. Consistent maintenance and preventive measures reduce the chances of future damage and protect your investment. If the problem appears extensive or keeps returning, professional assistance provides a reliable solution. Taking action early and using the right approach ensures that your plaster walls remain durable, stable, and visually appealing for years to come.


With decades of experience and a dedicated team of 40 professionals, Drywall Complete Services LLC delivers top-quality drywall and remodeling solutions. From installations to repairs and full remodels, we serve both residential and commercial clients across Southeast Michigan.